AWS Disaster Recovery: an overview and a backups tutorial
>
We've partnered with DailyDrip on a two-part series guiding you through Automated Backups and Disaster Recovery on AWS. This is part 1. Read part 2, which covers read replicas and multi-az.
Have you ever lost data? It can make for a bad day.
Now, imagine you lose your customer's data. That can make for a bad week, if you're lucky. If you're not so lucky, it can cost money, customer trust, bad publicity, and much more.
In today's episode we are covering disaster recovery on AWS. In particular, we will be focusing on a few techniques to deal with data loss mitigation and resiliency.
Getting Started
When it comes to databases, at one time or another, most of us have dealt with configuration of automated backups, replication, and the headaches that can come from those tasks.
Today, we'll be taking a look at some of AWS's offerings for automatic backups, Multi-AZ, and read replicas.
Let's take a moment to describe some of the available backup options within AWS.
| Approach | Description |
|---|---|
| Backup | This simply refers to the action of taking a snapshot of a database in its current state. This snapshot can then be used to recreate the database at that specific point in time. |
| Read Replicas | Outside of backups, this is the most commonly used configuration. In its most basic form, you have a master and a slave. The master propagates changes over to the slave. |
| Multi-AZ | Multi-AZ stands for multiple availability zone, which is very telling of its nature. A Multi-AZ setup consist of having multiple databases: a primary and one or more standbys that are in different availability zones. |
Backups
In Part 1, we'll focus on the simplest solution: backups.
By default, when you create an RDS instance in AWS, daily backups are enabled with a 7 day retention policy. The backups are performed during the daily maintenance window, which is defaulted to a random time based on the specified region.
In the RDS dashboard, let's click Instances in the left navigation menu. Once we are on the Instances page, let's click the Launch DB instance button in the top right corner.
We should now be on a page similar to the one below, to select our database engine for our new instance.
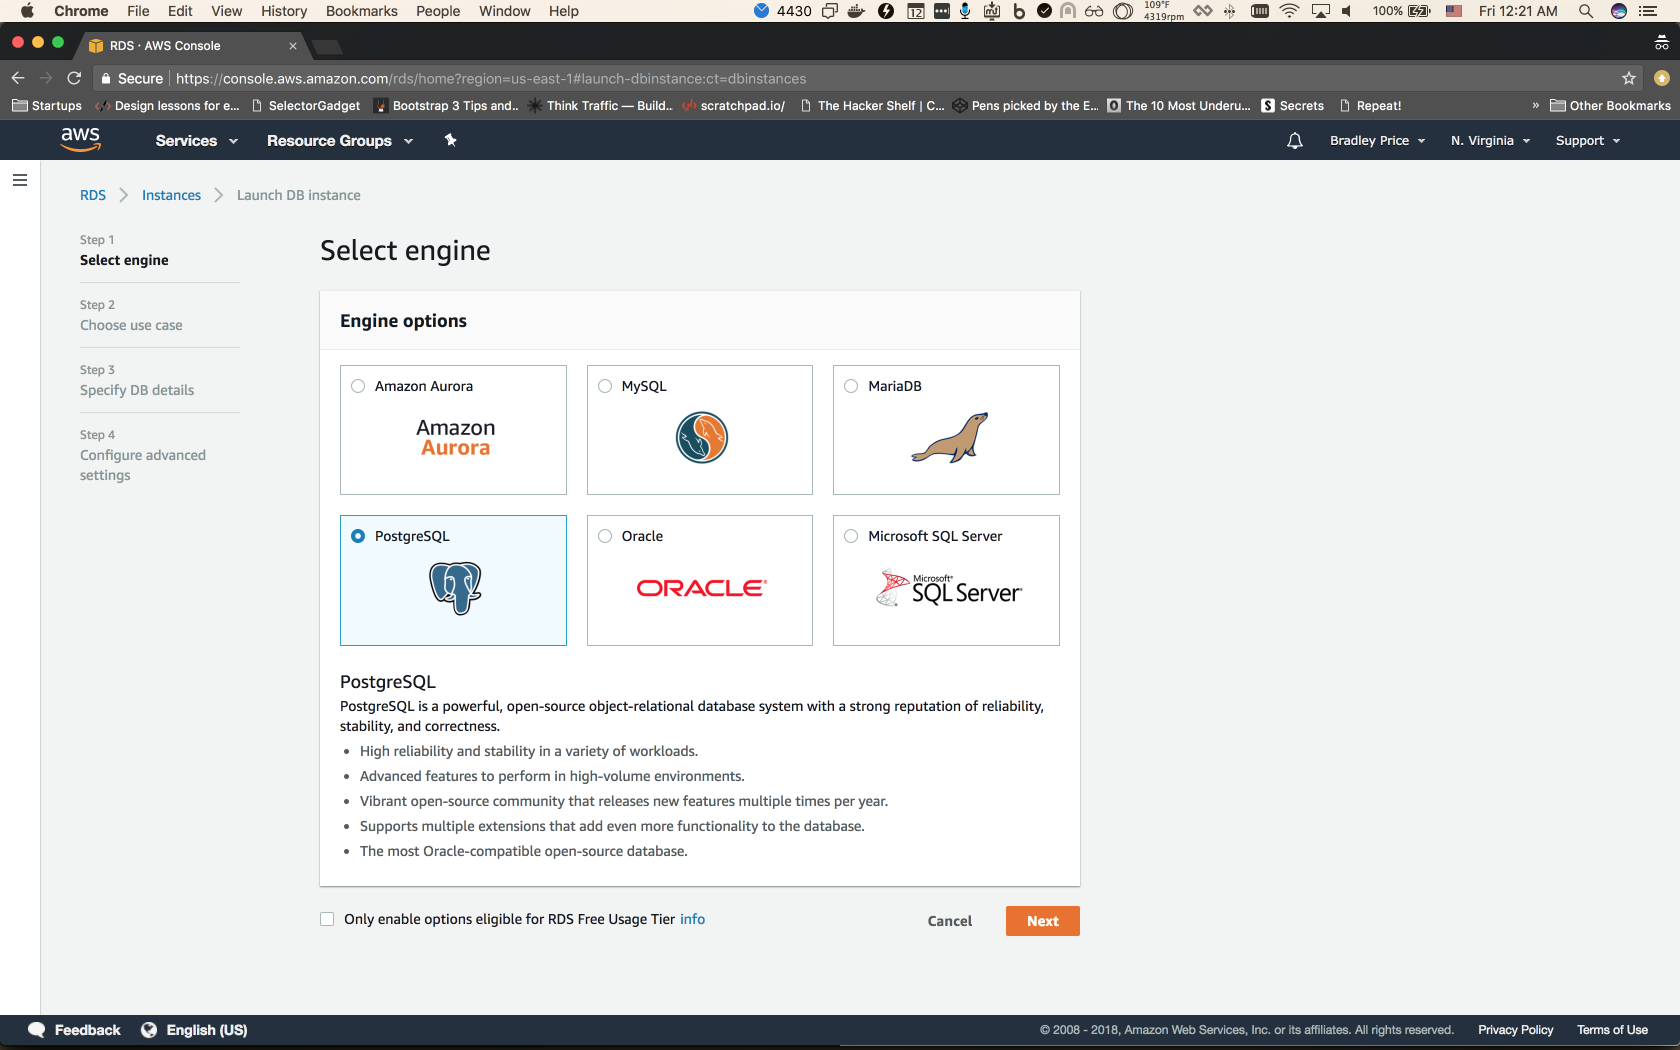
Select PostgreSQL and choose Next.
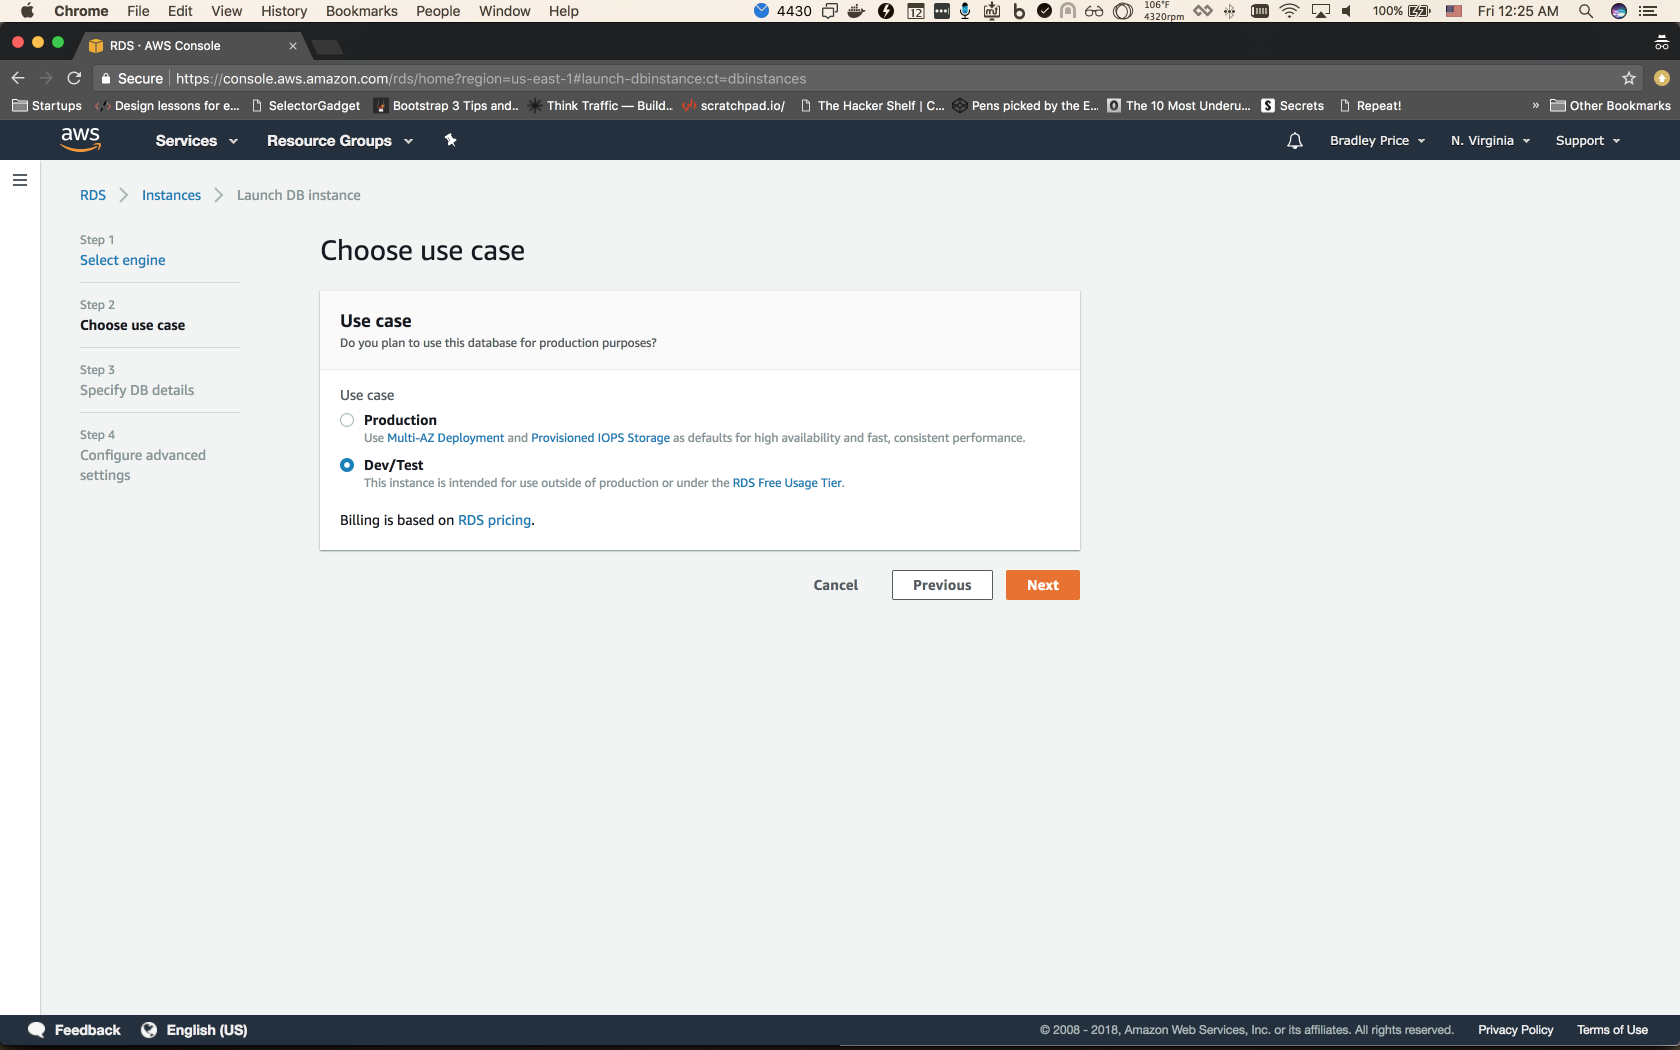
Now, we should be on the Choose Use Case step. For our scenario, we can choose Dev/Test and click Next.
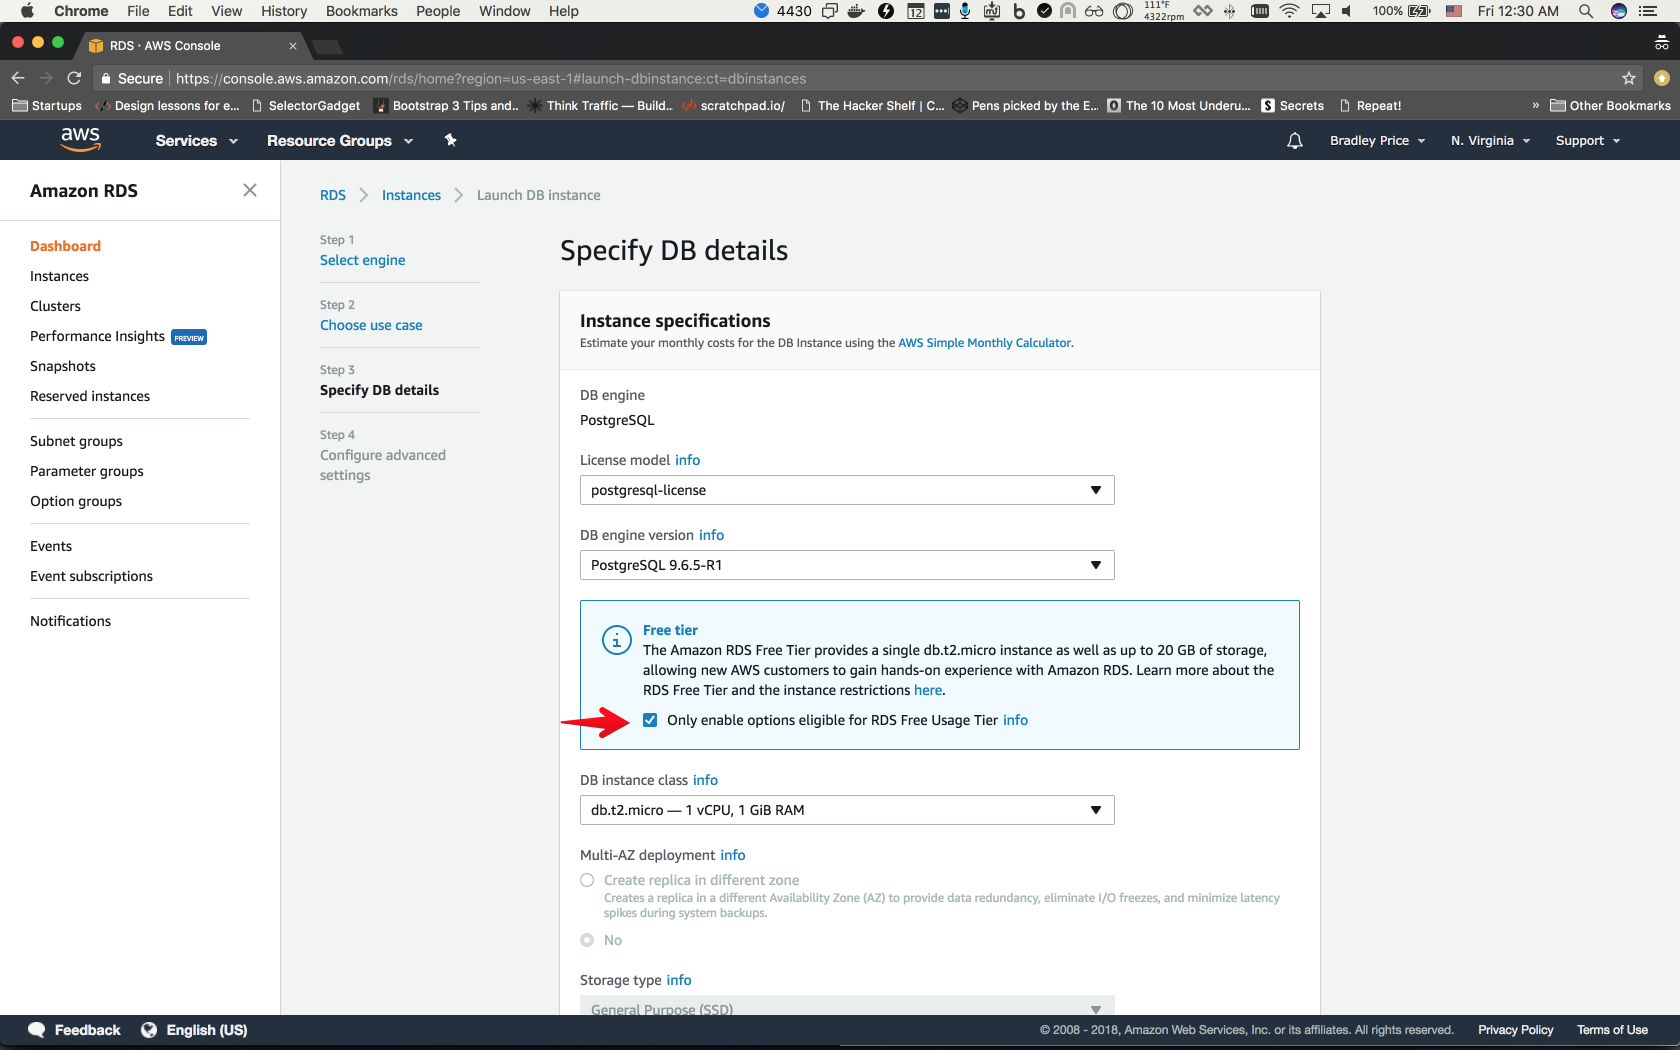
On this page, we can check Only enable options eligible for RDS Free Usage Tier. This will limit our settings, but will be fine for our use case.
Scroll down and enter your Instance Identifier, Username, and Password, then click next.

We are now on our last step: Configure Advanced Settings.
On this page, we need to make sure that Public Accessibility is set to Yes, set our Database Name, and scroll down to the Backup section.
Here, we can see the default retention period is set to 7 days. If we set this to 0, it would disable backups. We have the option of scaling this out to a maximum of 35 days.
We'll leave the defaults here and move down to the Maintenance section.
In the Maintenance section, you can see where you have the option of selecting a maintenance window, or leaving the default setting of No Preference for a random window to be assigned.
For now, we can leave that to its default setting and click Launch DB instance.
Once we've created the instance we can click the View DB Instance Details button which will take us to the overview page of our instance. You may notice that DB Instance Status is in a Creating state. It will take a few minutes for the instance to be available.
Once the instance is available, we can click the Instance Actions in the top right and see a dropdown of available actions. Specifically, we'll notice that we can trigger a manual snapshot with Take Snapshot and restore with Restore To Point and Time.
If we scroll further down the screen to the Snapshots section, we can see that we have one snapshot. This initial snapshot is created as part of the creation of the instance and plays into how the Restore From a Point in Time works.
Being able to restore from a point in time will use the latest snapshot before that point and use transaction logs up to the point so that you can restore from any point available in your retention policy.
So, let's dig into actually creating a snapshot and restoring.
Taking a snapshot
First, let's connect up to our database and add some data:
psql -Uroot -dtest -htest.cxywwt2zdqub.us-east-1.rds.amazonaws.com

test=> CREATE TABLE todos ( id SERIAL PRIMARY KEY, name varchar(100) );

test=> INSERT INTO todos (name) VALUES

test-> ('setup automatic backups'),

test-> ('take snapshot');

test=> select * from todos;

id | name

----+-------------------------

3 | setup automatic backups

4 | take snapshot

(2 rows)
Now, let's take a snapshot.
We can scroll up to the top of the screen and click Instance Actions and choose Take Snapshot. It will ask us to enter a Snapshot Name and then we can click Take Snapshot.
Once we've created the snapshot, it should redirect us back to the Snapshots page and we should see our new snapshot.
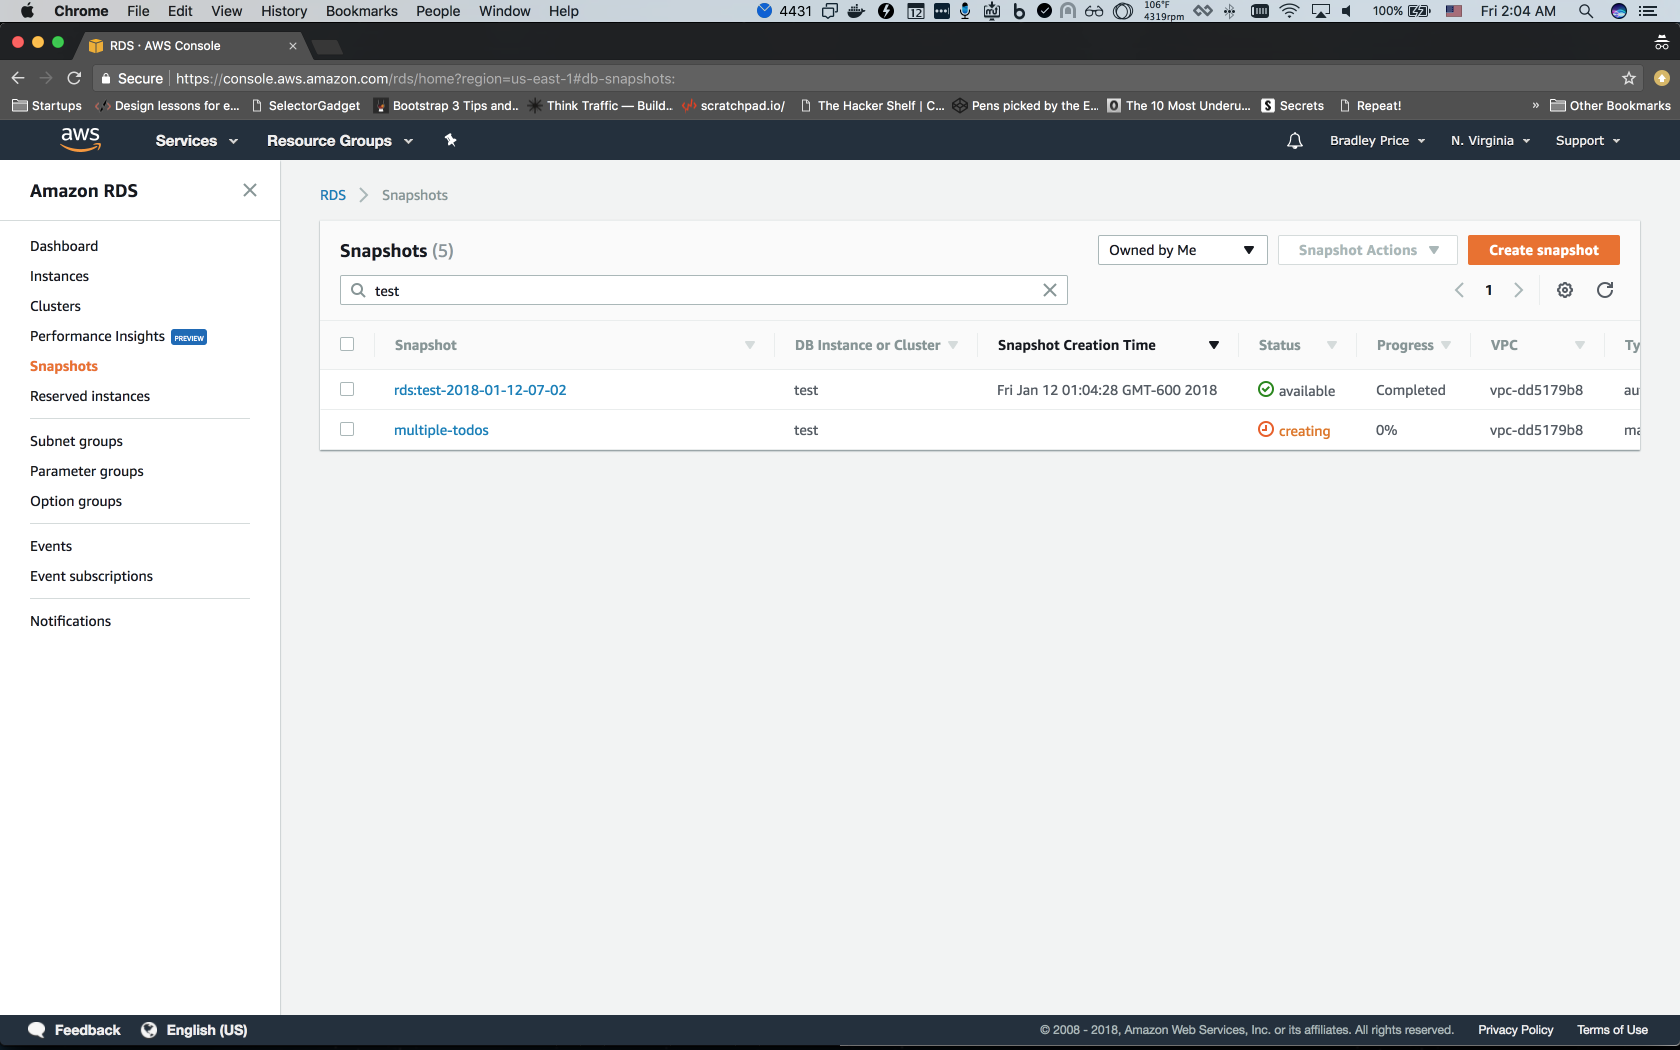
As you can see, I've named mine multiple-todos.
Restoring
Now that we've created a snapshot, let's delete some data from our database.
test=> delete from todos;

DELETE 2
Oops — we only wanted to delete one item, but accidentally deleted everything. Let's restore from our manual snapshot and see if we can get it back.
Let's go back to our Snapshots page and choose our snapshot. Then, in the top right, we'll click Snapshot Actions and choose Restore Snapshot.
We should now be on the Restore DB Instance page where we will configure a new instance to be created that our snapshot will be applied to.
On this page, let's select db.t2.micro for the instance class, which is the same as the instance we took our snapshot from. I'm going to set the DB Instance Name to test-snapshot. Now, we can scroll to the bottom and click Restore DB instance.
After a few minutes, our new instance should be available.
Before we can connect to the new RDS instance, we will need to go into the security group, click on the Inbound tab and set up a rule to allow traffic from our IP.
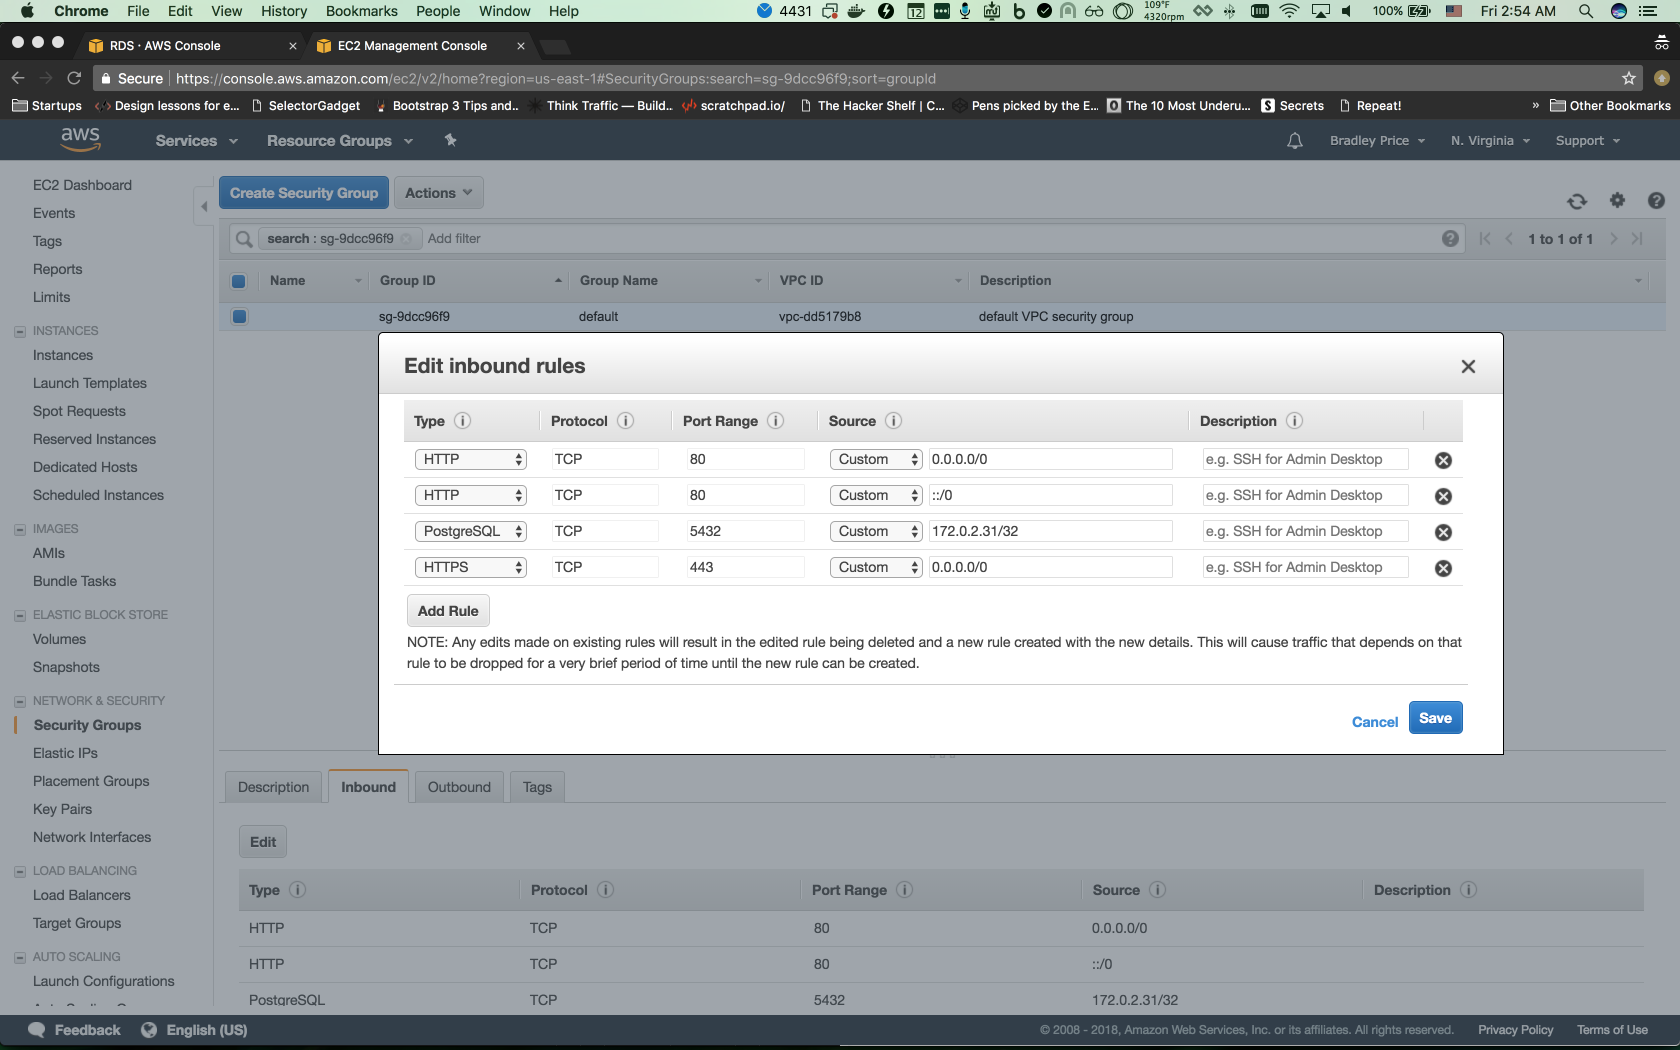
Afterwards, we should be able to connect to the new DB instance and verify that our data is now available.
psql -Uroot -dtest -htest-snapshot.cxywwt2zdqub.us-east-1.rds.amazonaws.com

test=> select * from todos;

id | name

----+-------------------------

3 | setup automatic backups

4 | take snapshot

(2 rows)
Now, we have access to all of our data from our snapshot; we could manually move bits of data over that we need, or point our application to our new database.
Summary
In this video, we went through an overview of backups, read replicas, and Multi-AZ. Then we configured a backup and created a snapshot. In part 2, we'll configure a read replica and a Multi-AZ.